Creating Freight Shipments using Manual Freight
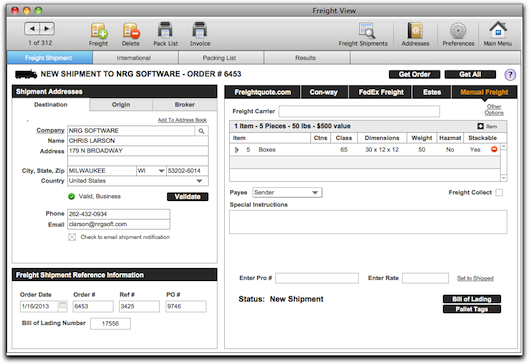
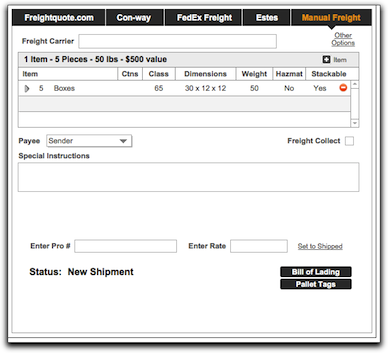
The main window is straight-forward and easy to use. Just click the Shipment icon to create a new shipment. Origin address and default shipment preferences will pre-populate to get you started. Below you'll find an overview of each of the main window components.
SHIPMENT ADDRESSES
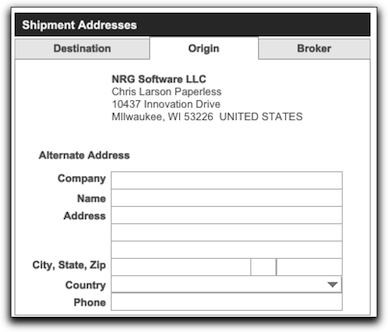
Origin - The origin info is pre-populated with the location address from the workstation preference.
An alternate origin address can be populated in the Alternate Address fields.
When rating a shipment, rates will be based on your account ZIP code, not the alternate address location.
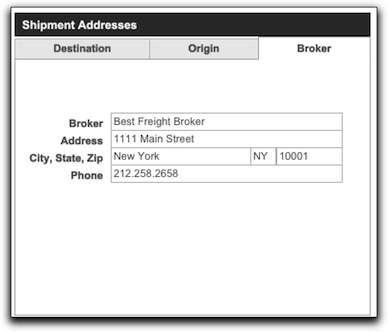
Broker - If a broker is being utilized on this shipment simply add the address by typing in the fields.
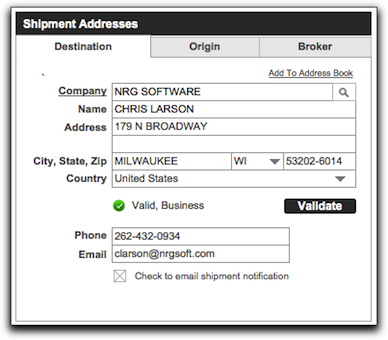
Destination - Simply add the address by typing in the fields or selecting from the address book, by clicking on the search icon next to the company name field.
Email Notifications - Clicking this box allows you to send email notification of the shipment.
The default settings can be configured by simply going into Preferences and the Email Notifications tab.
REFERENCE INFORMATION
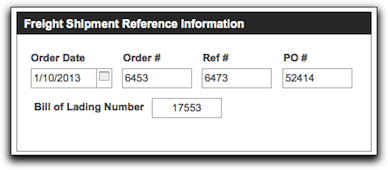
Reference Information - The Freight Carrier field will auto populate once the Frieght Carrier field is filled in on the right side of the shipping screen. The additional reference fields allows you to track your information for the specific shipment.
CREATING YOUR SHIPMENT
When the Manual Freight logo is orange, it is the active freight method on the screen and this is where you enter your shipment details.
Enter a Freight Carrier
Manually enter the name of the carrier you will be using here.
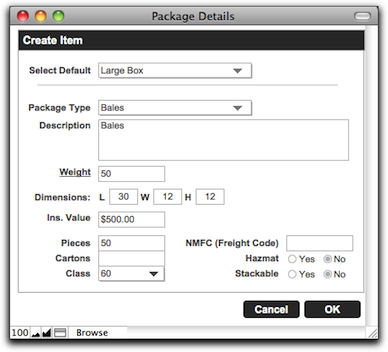
Add your Shipment Detail
Click on the Item icon in the Shipment info area. A pop-up window (see below) will appear and you can enter the description, package type, number of pieces, cartons, class, NMFC (Freight Code), weight, length, width, height, insurance value and whether the package is HazMat or stackable. Click "OK" and the package will be added to the shipment records.
You can click on the arrow icon in the list to bring the pop-up back and edit the package details. If you would like to delete a package simply click the minus sign under the stack header for the package.
Payee Information & Special Instructions
Default Pay Method is Sender, you can set payee to receiver, consignee or third party by selecting from the drop down menu. All payee information must be entered manually.
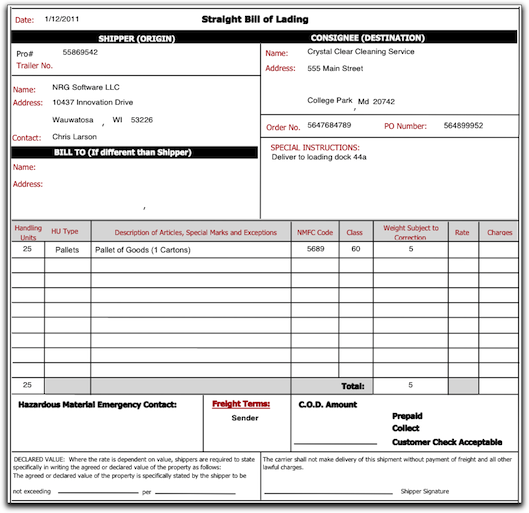
The special instructions and Payee information will appear on the BOL.
Bill To Address
If the bill to address is different than the shipper or origin address you need to enter that address here.
CONTACT CARRIER
After adding the shipment information you will need to contact the carrier to schedule a pick up. The carrier will typically provide you with a rate and Pro#. In order to set the shipment in NRG Ship Connect to shipped, you will need to provide a Pro#. (If you don't have a Pro number, just enter any value, you can update later)
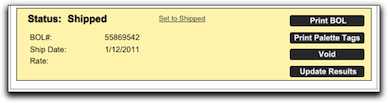
SET TO SHIP
After all of the shipment information is entered, including a Pro#, you can set your shipment to shipped. You will then see the shipment results and the status will be changed to shipped. Once the shipment status has changed to shipped, it will then update the shipment status, Pro# and cost in your FileMaker system.
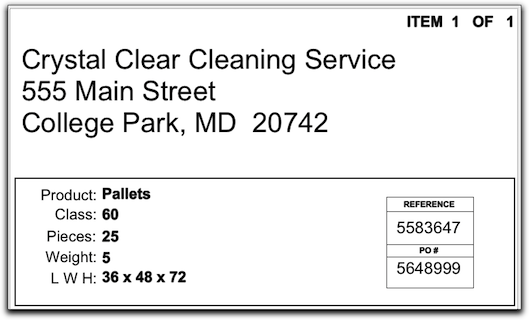
PRINT BOL & PALLET TAGS
You can print your Bill of Lading at anytime through out the shipping process. You will only be able to print the Pallet Tags after the shipments status has been set to shipped.
VOIDING A SHIPMENT PICKUP
Voiding a shipment pickup in NRG Ship Connect will simply change the status. You must also contact the carrier to formally cancel your shipment. Voiding will change shipment status, and clear out the Pro# and cost in Ship Connect and in your FileMaker system.
UPDATING SHIPMENT RESULTS
If you want to update the Pro# or rate information for the shipment simply click the Update Results button. Once the information is submitted it will then update in Ship Connect and in your FileMaker system.